 how-to
How to Detect Slab Leaks Without Destruction: 2026 Guide
Table of Contents
- Signs of a Slab Leak You Should Never Ignore
- Slab Leak Detection Tools the Pros Actually Use
- Step-by-Step: How to Detect a Slab Leak Without Breaking Concrete
- DIY vs. Professional Slab Leak Detection: Where to Draw the Line
- Is a Slab Leak Covered by Insurance? What Homeowners Need to Know
- Slab Leak Repair Cost Estimates 2026: What Affects the Number
- Conclusion
- Frequently Asked Questions
Last Updated: September 29, 2026
Signs of a Slab Leak You Should Never Ignore
A slab leak is a water leak in the pipes running beneath your home's concrete foundation. Left alone, it can warp floors, crack the slab, and feed mold growth for months before you notice. Learning how to detect slab leaks without destruction starts with reading the warning signs early.
Early Warning Signs Most Homeowners Miss
Watch for these signals before they turn into structural damage:
- Damp flooring or warm spots under carpet or tile
- A water bill spike with no change in your habits
- The sound of running water when every fixture is off
- Cracks in the slab or walls that keep growing
- Musty odors or mold growth near baseboards
- Low water pressure at multiple fixtures at once
When Symptoms Point to a Slab Leak vs. a Sewer Issue
Both problems cause damp floors and high bills, so homeowners often guess wrong. A few differences separate them:
- Slab leak: warm spots, clean water pooling, pressure drops
- Sewer issue: foul smells, gurgling drains, backups in multiple fixtures
Slab Leak Detection Tools the Pros Actually Use
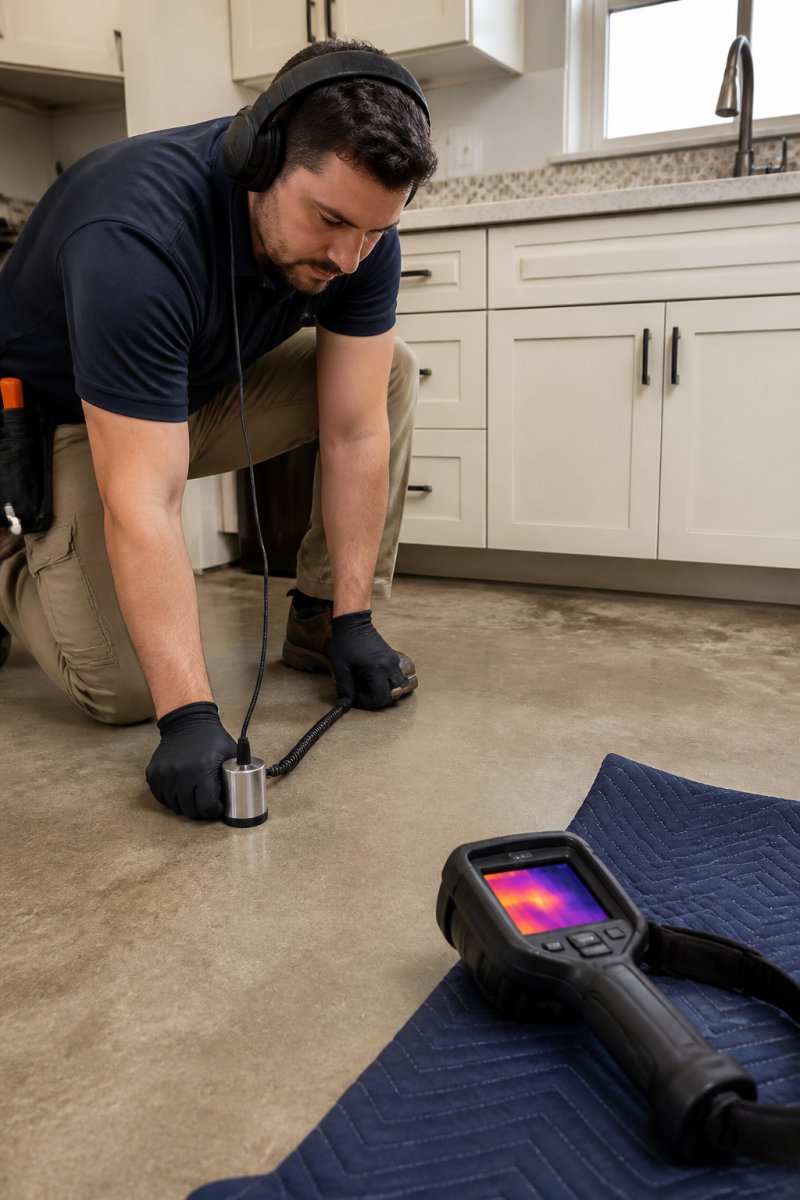
Professional detection relies on non-destructive tools that locate leaks without breaking concrete. The right equipment narrows the search to a small area, often within inches. What separates a good technician from a guesser is knowing which tool to trust for which pipe material and which leak type.
Acoustic Listening Equipment and Electronic Line Tracing
Acoustic listening tools pick up the sound of pressurized water escaping a pipe. The technician places a microphone against the slab and follows the loudest signal. The physics matter: water forced through a small opening creates a high-frequency hiss, while a larger opening produces a lower-frequency rush. Experienced technicians adjust the frequency band they listen to based on the pipe material and the leak size.
Thermal Imaging Cameras and Moisture Meters
An infrared camera shows temperature differences across the floor. A hot water leak appears as a warm patch; a cold line shows as a cool one. Thermal imaging is fastest on hot water lines because the temperature differential is large and easy to read. Cold water leaks are harder, the temperature difference may be only a few degrees, and the camera needs a stable ambient temperature to pick it up.
Matching the Tool to the Pipe Material
No single tool works equally well on every home. Here is how the three main pipe materials change the approach:
- Copper: Rigid and sound-transmissive. Acoustic listening is highly effective, and thermal imaging works well on hot lines. Copper is also prone to pinhole leaks that produce a steady, detectable signal.
- PEX: Flexible and sound-absorbing. Acoustic signals are weaker, so thermal imaging and moisture mapping often lead. Line tracing is essential because PEX routes can be less predictable than rigid pipe.
- PVC: Used mainly for drain lines, not supply. A slab leak on a drain line requires a different approach, hydrostatic testing and camera inspection rather than acoustic listening, because drain lines are not pressurized.
Step-by-Step: How to Detect a Slab Leak Without Breaking Concrete
You can run the first two tests yourself with no special tools. They take about 30 minutes and tell you whether a leak exists. Pinpointing the exact location is where professional equipment earns its keep.
Step 1: Run the Water Meter Test
This is the water meter test every homeowner should know:
- Shut off every fixture, appliance, and irrigation line.
- Find your water meter and note the reading.
- Wait 30 to 60 minutes without using any water.
- Check the reading again.
Step 2: Confirm With a Static Pressure Test
A static pressure test measures whether your system holds pressure when nothing is running. A technician connects a gauge to an outdoor spigot, isolates the system, and watches the reading. A slow drop confirms an active leak. A hydrostatic pressure test does the same job for drain lines.
Step 3: Pinpoint the Location With Non-Invasive Tools
Once a leak is confirmed, the technician combines acoustic listening, thermal imaging, and electronic line tracing to mark the spot. This is the part that keeps the repair small. A good pinpoint means one small access point instead of a torn-up floor.
| Step | What It Confirms | Time Needed | Tool Required |
|---|---|---|---|
| Water meter test | Leak exists | 30-60 min | None |
| Static pressure test | System losing pressure | 15-20 min | Pressure gauge |
| Acoustic listening | General leak area | 20-30 min | Listening device |
| Thermal imaging | Exact hot or cold spot | 15-20 min | Infrared camera |
| Line tracing | Pipe path and depth | 20-30 min | Electronic tracer |
DIY vs. Professional Slab Leak Detection: Where to Draw the Line
The water meter test is a fair DIY job. Pinpointing a leak under a concrete slab is not. Here's the threshold: if the meter moves, stop and call a pro. That single rule prevents most of the expensive mistakes homeowners make.
What You Can Safely Do Yourself
Three checks are safe, free, and require no special tools:
- The water meter test. Shut off every fixture and appliance, note the reading, wait 30 to 60 minutes, and check again. A moving dial means water is escaping somewhere.
- The warm-spot walk. Run your bare feet across the floor. A hot water line leak heats the slab from below, and you'll feel it before you see it.
- The sound check. With everything off, listen near the floor for running water. A faint hiss or rush points to a pressurized leak.
What You Should Never Do Yourself
Avoid DIY excavation. Breaking into a slab without knowing the pipe's exact path risks hitting a gas line, severing a drain, or cracking the foundation. That turns a repair into a re-pipe. The math is brutal: a professional pinpoint costs a fraction of what a botched excavation adds to the repair bill.
The Decision Framework
Use this sequence to decide when to stop and call a professional:
| What You've Confirmed | What It Means | Next Step |
|---|---|---|
| Meter still, no warm spots, no sound | No active leak detected | Recheck in 30 days if symptoms appear |
| Meter moves, no other symptoms | Leak exists somewhere | Call a pro for pressure testing |
| Meter moves plus warm spot or sound | Likely slab leak | Call a pro for pinpointing |
| Visible water, mold, or structural cracks | Active damage underway | Call a pro immediately |
Why the Threshold Matters for Your Wallet
A non-destructive detection visit typically costs far less than exploratory demolition. When a technician pinpoints the leak to within a few inches, the repair becomes a small access point instead of a torn-up floor. That difference, one small cut versus several square feet of broken slab, is where the real savings live.
Is a Slab Leak Covered by Insurance? What Homeowners Need to Know
Coverage usually splits in two. Most homeowner policies cover the water damage a slab leak causes, but not the pipe repair itself. Some policies add limited coverage for accessing the leak, which is why documentation matters.
Your insurance claim depends on proof. A detailed report with photos, thermal images, and a marked leak location is worth more than any verbal estimate.
Slab Leak Repair Cost Estimates 2026: What Affects the Number
Slab leak repair cost estimates vary widely, and no honest provider quotes a figure before seeing the leak. The price depends on where the leak sits, how deep the pipe runs, and how much access the repair needs.
Here's what drives the number:
- Leak location under a finished floor versus an open area
- Pipe material and whether it can be patched or needs replacing
- Access method through the slab, from above, or rerouted overhead
- Damage scope including flooring, drywall, and mold remediation
- Repair method spot repair, rerouting, or full repiping
Conclusion
A hidden slab leak rarely announces itself. It shows up as a warm floor, a climbing bill, or a crack that keeps spreading, and by then the damage has a head start.
Frequently Asked Questions
Can you have a slab leak and not know it?
Yes. Many slab leaks start as pinhole leaks under the concrete and can run for weeks or months before you notice anything. The first clue is often a water bill spike or the faint sound of running water when every fixture is off. Because the water travels through the soil and slab before surfacing, damp flooring or hot spots may not appear until the leak has already caused damage. A water meter test and acoustic listening tools can confirm a hidden slab leak before visible symptoms show up.
How long can a slab leak go undetected?
A slow pinhole leak can go undetected for months, especially if it is under a carpeted room or a slab that stays dry on the surface. Underground pipes lose water into the soil first, so the leak only becomes obvious when it reaches the surface or drives up your water bill. By then, pipe corrosion and foundation damage may already be underway. If your water meter test shows continuous flow with all fixtures off, schedule professional slab leak detection rather than waiting for visible signs.
Do I need professional equipment to find a slab leak?
You can narrow down whether a leak exists with a water meter test and by watching for signs of a slab leak like warm spots or damp flooring. Pinpointing the exact location without breaking concrete requires acoustic listening equipment, thermal imaging, and electronic line tracing. Those tools let a technician mark the leak on the slab surface before any access is opened. If your meter test confirms a leak, professional slab leak detection tools will save you from exploratory digging.
Will homeowners insurance cover a slab leak?
Whether a slab leak is covered by insurance depends on the cause and your specific policy. Most policies cover sudden and accidental water damage and the resulting access and repair work, but they often exclude the cost of fixing the pipe itself and any damage from long-term seepage. Documenting the leak with photos, moisture readings, and a written report from a licensed provider gives your adjuster what they need. Review your policy language and ask your insurer how they treat slab leak claims before work begins.
California Leak Detection Specialists finds the source with non-invasive tools, then backs it with the documentation your insurance company needs. Our family-owned, licensed, and insured team handles residential leak detection, sewer camera inspections, and full repiping, with accurate diagnosis and minimal access. Call (951) 278-8999 to schedule your inspection and get a clear answer on where the leak is and what it takes to fix it.