 how-to
How to Fix a Slab Leak Under Concrete Foundation
Table of Contents
- What Is a Slab Leak and Where It Occurs
- Signs Your Home Has a Slab Leak
- How Plumbers Detect Slab Leaks
- Slab Leak Repair Methods: Your Options Explained
- The Slab Leak Repair Process: What to Expect
- How Long Does Slab Leak Repair Take
- What to Do If You Suspect a Slab Leak
- Costs, Insurance, and Documentation
- Frequently Asked Questions
Last Updated: October 11, 2026
What Is a Slab Leak and Where It Occurs
A slab leak is a break or crack in water pipes that run beneath your home's concrete foundation. These pipes carry hot and cold water to your kitchen, bathrooms, and laundry areas. When they fail, water escapes directly under the slab, causing damage you can't see until it becomes serious.
Slab leaks occur in the space between your foundation and ground below, where plumbing lines run through or beneath the concrete slab. Over time, pipes corrode, shift, or crack, causing water to pool under your foundation.
Unlike visible leaks under sinks or in walls, slab leaks cause silent damage beneath your feet. Knowing how to fix a slab leak under concrete foundation is critical, early detection saves thousands in structural damage.
Signs Your Home Has a Slab Leak
Look for these warning signs:
- Warm spots on your floor (hot water line is leaking)
- Damp or wet patches on flooring or carpets
- Cracks in walls, especially near corners or doors
- A persistent musty smell in your home
- Unusually high water meter readings
- Water pooling in your yard or foundation
- Reduced water pressure throughout your home
How Plumbers Detect Slab Leaks
Finding a slab leak requires specialized equipment and training. Professionals use tools that listen, measure, and visualize what's happening beneath your concrete.
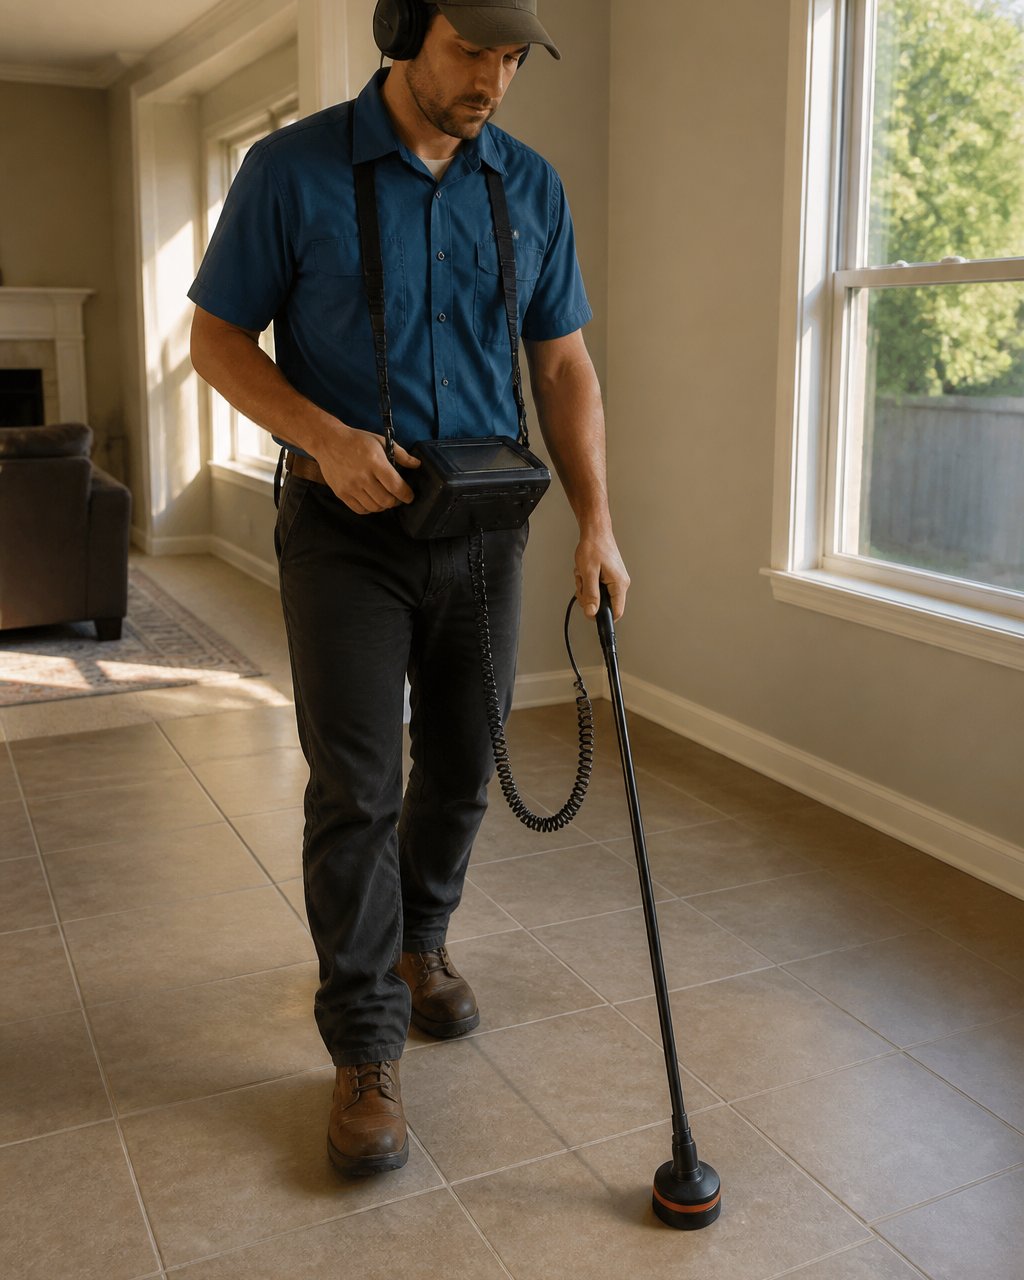
Acoustic listening uses sensitive equipment to hear water escaping from pressurized pipes. Trained technicians can pinpoint the leak location within a few feet.
Thermal imaging cameras detect temperature differences from hot water leaks, showing the exact location on the floor or ground.
Pressure testing isolates sections of plumbing and measures pressure. A steady drop indicates a leak in that section.
Professional leak detection saves time and money by pinpointing the exact location and preventing unnecessary digging and damage.
Slab Leak Repair Methods: Your Options Explained
Once your leak is found, you have choices. The best method depends on leak location, home layout, pipe condition, and budget.
Comparison Framework: How to Choose
Consider these factors: Access and disruption (concrete cutting vs. wall openings vs. trenchless methods), pipe condition (isolated leak vs. system-wide corrosion), leak location and depth, durability (quick fix vs. long-term reliability), timeline and cost, and flooring restoration needs.
Concrete Cutting and Direct Repair
How it works:
- Mark the leak location on the concrete surface using detection equipment
- Use a concrete saw to cut an access hole (typically 12 to 24 inches square)
- Remove concrete debris and expose the damaged pipe
- Repair the damaged pipe (patch with epoxy putty, seal with a coupling, or replace the section entirely)
- Backfill the hole with new concrete and allow it to cure
Best for: Accessible, isolated leaks near the surface. Advantages: Fast, full visibility, lower cost. Disadvantages: Floor disruption, concrete restoration time, doesn't address system-wide corrosion. Timeline: 4-8 hours plus 24-48 hours curing.
Pipe Rerouting and Repiping
How it works:
- Run new water lines through your home's walls, ceilings, or crawl spaces
- Connect the new lines to your fixtures (kitchen, bathrooms, laundry)
- Abandon the old leaking pipe underground (it remains pressurized but unused, or is capped)
- Test the new system for proper flow, pressure, and leaks
Best for: Multiple leaks, aged plumbing, galvanized steel pipes. Advantages: Eliminates future leak risk, avoids concrete cutting, modernizes system. Disadvantages: Higher upfront cost, wall/ceiling disruption, longer timeline. Timeline: 2-5 days.
Trenchless Repair Options
Trenchless methods repair pipes without digging up your slab. Epoxy pipe lining seals the inside of damaged pipes with resin, creating a new pipe within the old one, ideal for cracks or pinhole leaks. Pipe bursting breaks the old pipe and pulls a new one through in its place, working for severely damaged pipes.
Best for: Isolated cracks, pinhole leaks, suitable pipe materials (copper, PVC, cast iron). Advantages: Minimal disruption, faster than rerouting, lower cost. Disadvantages: Limited to certain materials/leak types, doesn't address system-wide corrosion. Timeline: 4-12 hours.
Decision Checklist
Before committing to a repair method, ask your plumber:
- Is the leak isolated or part of a larger corrosion problem?
- What is the pipe material (copper, PVC, galvanized steel, cast iron)?
- How deep is the leak, and how accessible is it?
- Will the repair method require wall or ceiling openings?
- How long will concrete curing or restoration take?
- What is the expected lifespan of this repair versus alternatives?
- Are there any pipes that may fail soon after this repair is complete?
The Slab Leak Repair Process: What to Expect
Most slab leak repairs follow this sequence: (1) confirm leak location with detection equipment, (2) shut off water or isolate the line, (3) access the damaged pipe, (4) repair or replace it, (5) test the repair, and (6) restore the area.
How Long Does Slab Leak Repair Take
Timeline varies by method: concrete cutting (4-8 hours), rerouting (2-5 days), trenchless repair (4-12 hours). Actual time depends on leak accessibility, additional leaks discovered, plumbing age, and access needs. Most homeowners return to normal water use within 24 hours.
What to Do If You Suspect a Slab Leak
Act on suspicion to prevent worse damage. Water continues to escape and damage your foundation while you hesitate.
Immediate Shutdown and Damage Control (First 30 Minutes)
Step 1: Locate your water shutoff valve (typically outside near the street, inside near the water meter, or on the exterior wall where water enters). Turn it clockwise to shut off water. Make sure everyone in your household knows its location.
Step 2: Shut off water if you confirm a leak.
If you have strong evidence of a slab leak (warm floor, wet spots, high water bill, running water sounds with all fixtures off), turn off the main water shutoff. This stops water from escaping under your foundation while you arrange professional detection.
You can restore water to specific fixtures later if needed, but stopping the leak immediately is your priority.
Step 3: Document visible signs with photos of wet spots, warm areas, cracks, pooling water, and your water meter reading. Note when signs appeared and which areas are affected.
Verification Steps (Next Few Hours)
Step 4: Check your water meter. Record the reading with all fixtures off. Wait two hours with no water use and check again. If the meter advanced, you have a leak.
Step 5: Compare your water bill to the same month last year. A 20% or greater jump with no change in usage points to a leak.
Step 6: Isolate the leak location. If you have a hot water shutoff valve, turn it off and check if wet spots persist. If they do, the leak is in the cold water line; if they stop, it's in the hot water line. Do not dig or cut into your slab yourself.
What NOT to Do
Do not ignore the signs. Water damage compounds quickly. A leak discovered and repaired early costs far less than one that spreads for weeks or months.
Do not attempt DIY leak location. Slab leaks require specialized acoustic, thermal, or pressure-testing equipment. Guessing where the leak is leads to unnecessary digging, damage to your home, and potential injury.
Do not cut or excavate your slab without professional guidance. You risk hitting electrical lines, gas lines, or other utilities buried beneath your foundation. Improper excavation can cause injury or create new problems worse than the original leak.
Do not delay calling a professional. The longer water escapes beneath your home, the more damage spreads to your foundation, concrete, and structure. Early detection and repair prevent costly foundation repairs later.
Do not assume your insurance will cover it without checking. Call your insurance agent and describe the situation. Ask whether sudden, accidental water damage from a burst or leaking pipe is covered. Gradual leaks or damage from lack of maintenance may not be covered.
Call a Professional
Once you have confirmed signs of a leak and documented what you see, contact a licensed residential plumber for professional leak detection. Do not wait for the problem to worsen.
When you call, provide:
- Your water meter test results (did it advance with no water use?)
- Your water bill comparison (percentage increase)
- Location of wet spots, warm areas, or cracks
- Whether the problem is in hot or cold water lines (if you isolated it)
- Photos of visible signs
- Your home's age and plumbing type (if you know it)
A professional will use acoustic listening, thermal imaging, or pressure testing to pinpoint the exact leak location. This prevents guesswork and unnecessary damage to your home.
Costs, Insurance, and Documentation
Understanding what to expect financially helps you plan. Costs vary widely based on repair method and leak severity.
Detection costs are typically modest. Most homeowners pay a reasonable fee for professional leak location. This investment prevents expensive guessing.
Repair costs depend on your chosen method. Concrete cutting and direct repair is usually less expensive than full repiping. Trenchless methods fall in the middle.
Insurance coverage varies by policy. Many homeowner's insurance policies cover sudden, accidental water damage from leaks. Gradual leaks or damage from lack of maintenance may not be covered.
Documentation matters for claims. Keep all receipts, repair invoices, and photos of damage. Professional reports from licensed plumbers carry weight with insurance companies.
Get multiple perspectives. If you're filing a claim, ask your plumber for a detailed written report of the leak location, cause, and repair method.
If you suspect a slab leak under your concrete foundation, don't delay. The longer water escapes beneath your home, the more damage spreads to your foundation and structure.
Frequently Asked Questions
How do you fix a water leak under a concrete slab?
Fixing a slab leak depends on the pipe's location and the damage severity. Plumbers typically choose between three main approaches: cutting through the concrete to access and repair the pipe directly, rerouting the plumbing lines above the slab to bypass the damaged section, or using trenchless methods like epoxy pipe lining to seal the leak from inside. A licensed plumber will recommend the best slab leak repair method based on your specific situation, the pipe material, and how much disruption you can tolerate.
Can you repair a slab leak without breaking the concrete?
Yes. Trenchless repair methods allow plumbers to fix slab leaks without removing concrete. Epoxy pipe lining seals leaks from inside the pipe, while other techniques minimize excavation. However, not every slab leak is a candidate for trenchless repair, the pipe location, damage extent, and accessibility matter. A professional inspection determines whether your situation qualifies. Rerouting water lines above the slab is another way to avoid concrete cutting, though it requires routing new plumbing through walls or attics.
How do plumbers find a leak under a concrete foundation?
Plumbers use several detection methods to locate slab leaks. Acoustic listening devices pick up the sound of water escaping from pipes beneath the concrete. Thermal imaging cameras detect temperature differences from water flow. Pressure testing isolates which plumbing line is leaking. Water meter readings help confirm whether a leak exists. A combination of these techniques pinpoints the exact location, minimizing guesswork and reducing unnecessary concrete cutting during repair.
How long does slab leak repair take?
Timeline varies by repair method and complexity. A straightforward localized repair may take 1-3 days, while rerouting plumbing lines can require 5-7 days or more. Trenchless repairs typically finish faster than concrete-cutting methods. After repair, concrete patching, flooring restoration, and landscaping add time. Your plumber will provide an upfront timeline based on the detection findings. Factors like pipe accessibility, damage extent, and whether your insurance requires documentation can extend the overall process.